Viewing and filtering data
ZeyOS has been designed to store huge amounts of data - be it thousands of customers or items. Especially when a system is shared by dozens of users, it is easy to lose a clear overview. This is why it is important to be able to filter through those data sets fast and conveniently.
Although ZeyOS includes a multitude of different applications, the filtering mechanics are roughly the same.
The data is displayed as a table view, and at the top and right there is a filter bar to quickly find information and divide it into categories. In some cases, applications are further divided into subcategories by tabs.
The User Interface
When you open an app in ZeyOS, the filter view (also called overview or index) consists of the following elements:
- The App-Specific Buttons & Tabs
- The Filter Field
- The Saved Filters Menu
- The Filter Shortcuts (e.g. Personal or Followed)
- The Field Selection Dialog & Menu
- The Reload button
- The Export button
- The Mindlog button
- The Filter Side Bar with the app's default filters
- The View
The App-Specific Buttons & Tabs
There are several buttons in the top left corner of every filter view. ZeyOS always offers the button to create a new element and usually several others that will lead to certain views of the app or open a custom weblet. Some larger apps (like Transactions or Inventory) are subdivided into tabs which contain different aspects of that app.
The Filter Field
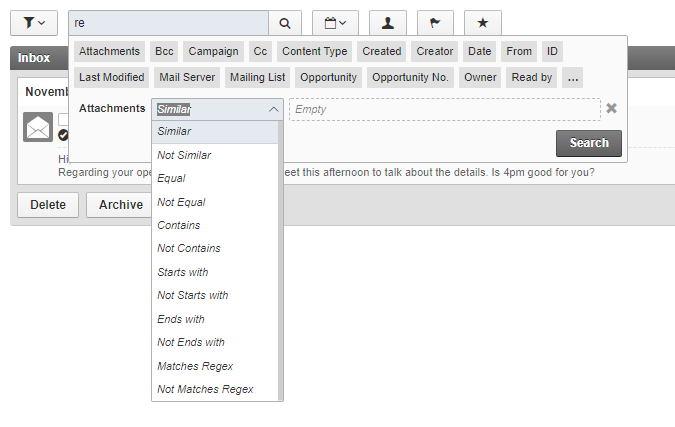
The search box is located above the data view and, in addition to the normal search, offers sophisticated filter options, which you can access by clicking in the text field. Immediately, you will see all the available fields of the view in a list below the search box. You can select the desired field directly or limit the field selection if necessary by entering the first letters of the desired field.
Once selected, it is possible to further restrict the information according to the data type. After selecting a data type, select a corresponding comparison function (default is "same or similar") and write the desired comparison value in the text field.
By repeating this process, several filters or subfilters can be stored at the same time. You can remove a filter by clicking on the 'X' on the right.
The Filter Shortcuts
Many apps offer shortcuts for the most common filter functions. These can be date filters with popular filter values (such as "Since 180 days" or "Last month") or a button to show unread messages. Two additional buttons are part of every filter view: One button to show only personal elements (i.e. those which you own or are assigned to) and one to show only "followed" elements (i.e. those which you previously marked with the Follow flag, see below).

The Field Selection Dialogue & Menu
Of course, you also want to select which columns are shown in the table view. By clicking on the list icon in the top right corner of a table view, new columns can be added or removed. This opens a window with the existing fields and those that can still be added. Apart from the main column of the view in question (usually "name") you can select each column (even created by yourself) and adjust the order as you wish.
The dialogue also allows you to group and sort (ascending or descending) the data based on a specific column. Clicking a column header sorts the information by that category. The small gray icon in the column indicates whether the data is sorted in ascending or descending order.
You can save your current selection by clicking Save Current Fields... in the drop-down menu and typing a name for later loading. Just like the filters, you can switch between different saved selections with just one click and thus customize the data view to your liking in a few seconds.
These changes are user-specific. Any user can choose any sort without changing the display for other users.
Save views and column layout
You can save your current selection by clicking on Save Current Fields... (icon: small arrow pointing down) in the drop-down menu and entering a name for later loading. By clicking on this icon again, you can then select and switch between different saved views.
These changes are user-specific. Each user can choose any sorting without changing the display for other users.
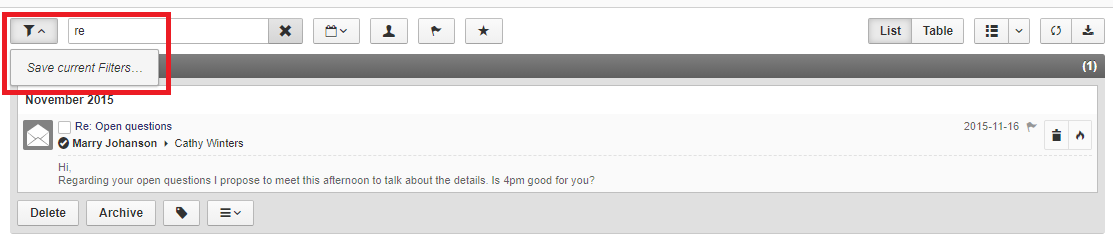
The Saved Filters Menu
In addition, frequently used filters can also be saved. Below the buttons and tabs there is the filter bar. The button on the far left opens a drop-down menu that allows you to save the currently selected filters and load the previously saved filters. Once you have set a reusable selection of filters, you can save them by clicking on the mentioned button and saving current filters... choose. From there, enter a name for the filter selection and save. Loading filter selections saved in this way is just as easy: open the drop-down menu and select the desired filter selection from the list. There, created filters can also be deleted with the help of the "x". The following sections show how to operate each filter.
The Reload Button
The reload button refreshes the view with the exact same filters that you have previously set. This is useful when you want to see new mails, for example, or changes made by other people on your team.
The Export Button
ZeyOS offers standard exports for every app. Those are XLS (Excel Spreadsheet), ODS (OpenDocument Spreadsheet), CSV (Comma-Separated Values), TSV (Tab-Separated Values), XML (Extensible Markup Language), and JSON (JavaScript Object Notation). ODS can be opened with e.g. OpenOffice Calc, the latter four are different text formats that are commonly used for data exchange. Some apps provide a special export for its data, such as iCalendar for tasks or vCard for contacts. Custom exports are also possible (e.g. an export for transactions that exactly suits the requirements of your invoicing software).
The Mindlog Button
The Mindlog button provides an easy way to filter Mindlog based on the app you are currently in. Clicking the button will forward you to Mindlog and select the appropriate entities filter there (see the menu on the lower left).
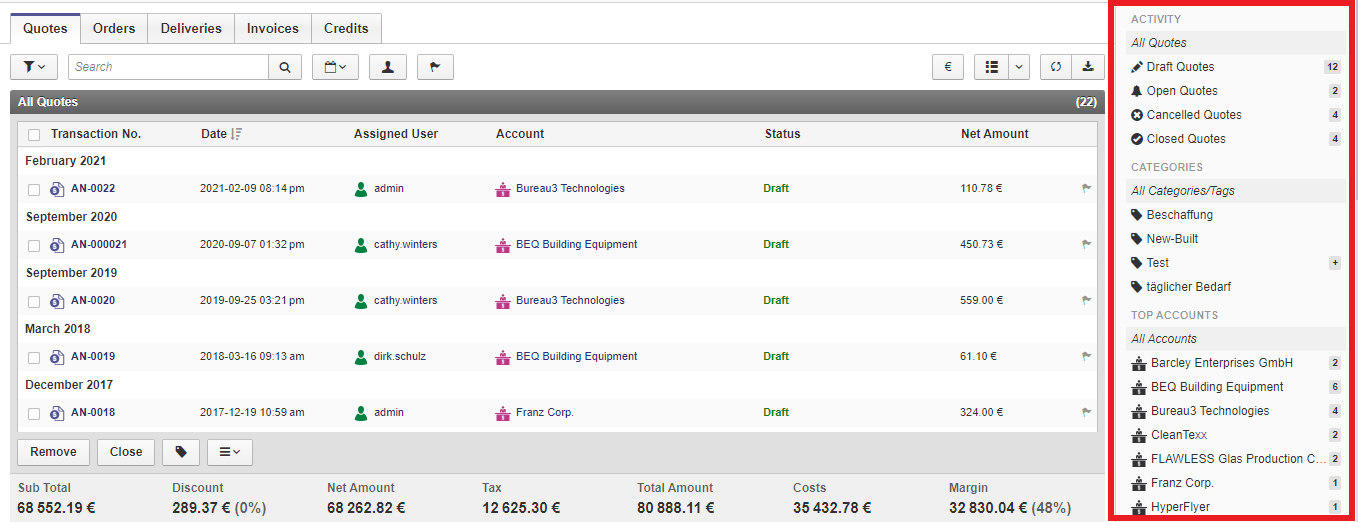
The Filter Side Bar
The filter bar on the right side of every filter view contains multiple common filter criteria. Depending on the app, these typically are:
- Status and Activity
- Category/Tag
- secondary entity
Status and activity: Here it is possible to view drafts, open orders, canceled orders and completed orders. These options are also further subdivided. In other modules, a similar subdivision is offered according to their nature.
Category/Tags: You can also filter objects by their categories or tags. The list shows the categories created. The name of the category must correspond to the assigned day. Any tree structures must be created separately as a category. To make the "Tree/Branch/Leaf" tag visible as a filterable category, the "tree", "tree/branch", and "tree/branch/leaf" categories must be created. Categories thus offer a way to show the relevant from many tags as a quick filtering option. Categories can be edited with the pen icon (hovering over "categories"). By clicking on "More" in the same place, you can also filter directly after a specific day.
secondary entity: The third option of the filter bar refers to the secondary entity of the respective module, for transactions such as the customers or suppliers or for items the warehouses. First, only the most commonly used objects of the secondary entity are displayed, e.g. the customers to which an invoice has been written most often. Similar to the categories, you can search directly for a specific object. By clicking on "More" a search bar displays. After you select an item, the summary list displays related information. For example, if multiple orders have been placed by a customer, they will list them all.