Importing Data
To ensure that contacts, appointments, tasks, etc. do not have to be transferred manually and time-consumingly to the ZeyOS account, users can import their data both at the first set-up of the profile as well as in a few steps afterwards.
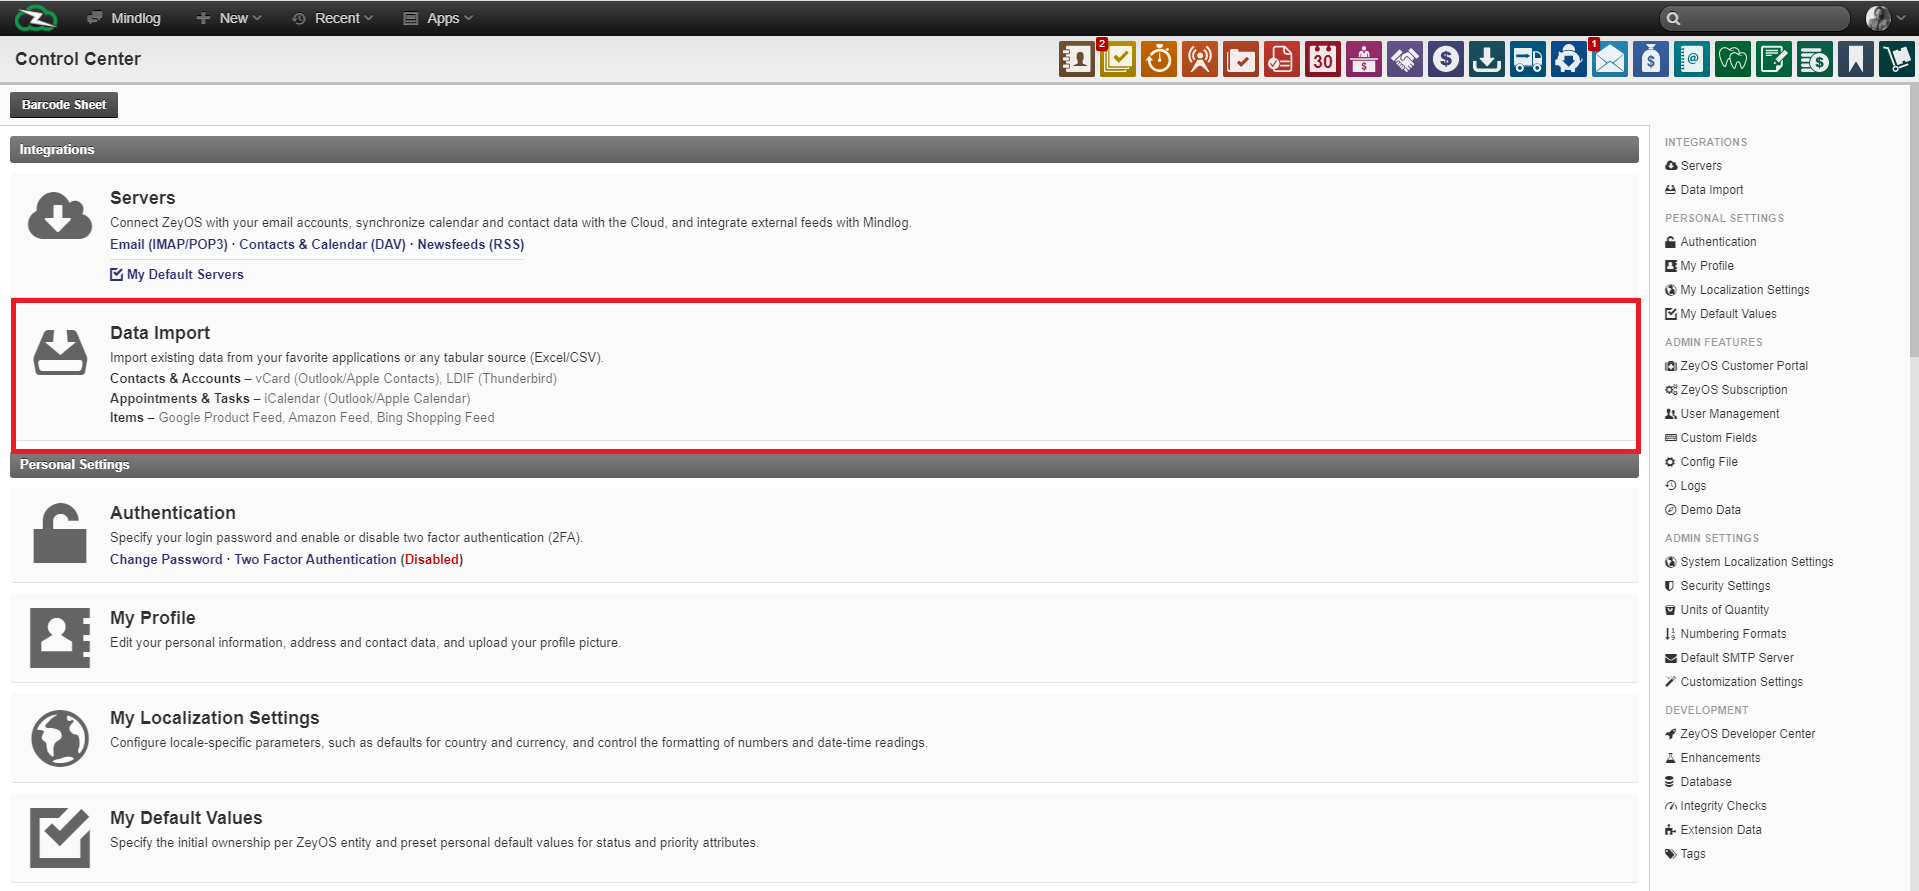
To do this, click the second sub-item of the category "Integrations" in the Control Center, and then select Data Import.
Now you will see all applications into which you can import external inventory data.
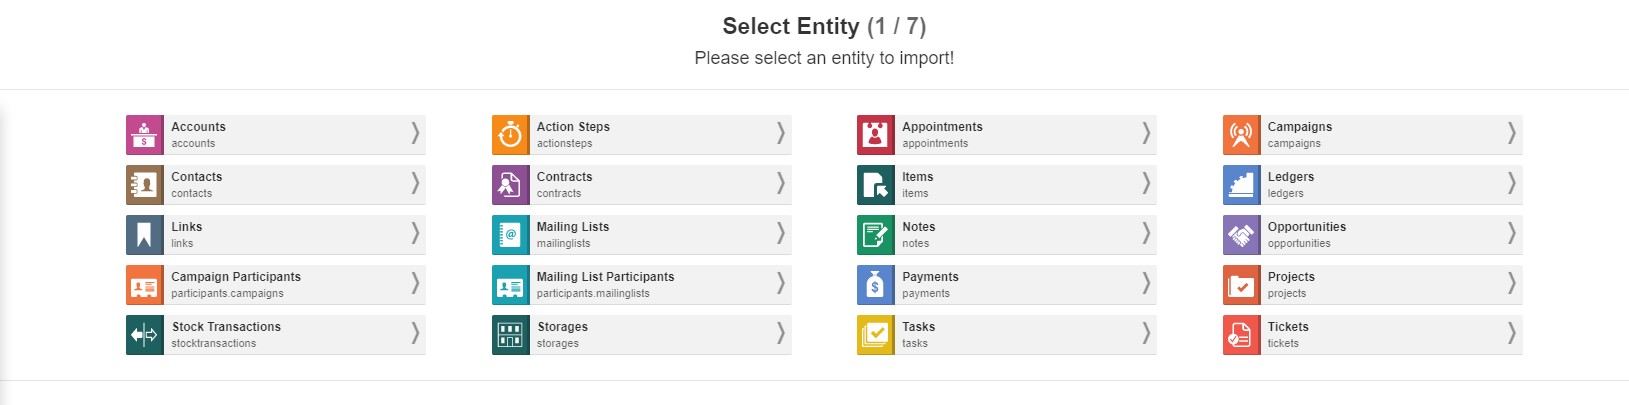
After selecting the appropriate entity, you can select the external document from your computer, which contains the desired files. Any type of tabular document, such as Excel, is suitable for this purpose.
In the next step, the fields can be assigned manually:
If necessary, select the import field to match the respective ZeyOS field. Default values can also be set.
If desired, the name of the import can also be adjusted in the upper right field. Otherwise, you can do this during the final import.
In the fifth step, you have the option to check the previous settings. If necessary, you can restart the import for changes or return to one of the previous steps.
Finally, all you have to do is import the data and you can use it as usual right away.